Home | Saltwater Flies | Fly Tying Materials | Saltwater Fly Fishing Accessories
Ordering Instructions, Shipping rates, Your Satisfaction Guaranteed | Site Map
Fly Tutorial - How to Apply Epoxy
<< back to mixing epoxy
Like other fly tying techniques, applying epoxy requires patience and practice, but overall it is much less technical
than traditional thread-and-hair methods. If you have never used epoxy before, I suggest
practicing on a couple of old flies you do not mind sacrificing. This will let you become
comfortable with the material without the additional worry of ruining a labor intensive fly,
as those requiring epoxy tend to be.
|
As with mixing your epoxy, I suggest maintaining a clean work space since epoxy is a messy material to work with. Have your bodkin or other application tool on hand as well as a few small rags
(an old t-shirt cut into small squares is a huge help in this sort of process) to wipe up the
inevitable messes. You will also need a drying wheel to rotate the flies as the epoxy cures,
unless you want to turn the flies by hand to prevent the epoxy from sagging.
Using Epoxy |
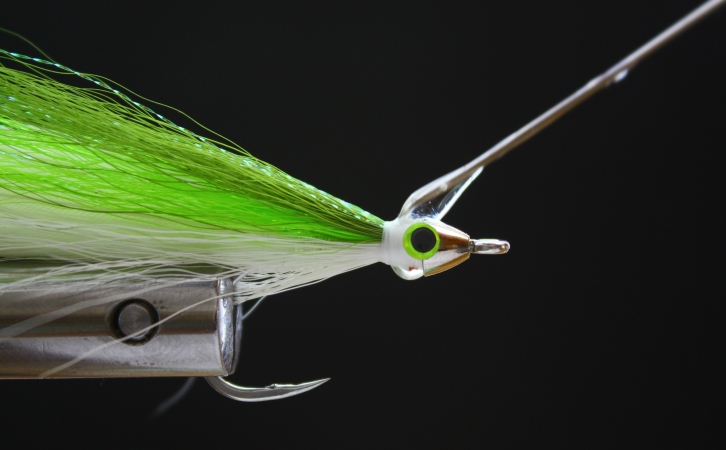
| Many times epoxy is used not just to increase durability, but to add weight, as is the case with the jiggy deceiver pictured below. In these instances, or other occasions where you are adding a thick coat, try this technique. |
| You can use this same basic technique, but with less epoxy, to coat the head of much smaller flies or the body of an epoxy minnow. Practice will help you determine how much epoxy to apply with different flies as well as when the epoxy has thickened too much to be usable. |
| Step 1: Collect a large drop of mixed epoxy on your bodkin or applicator, and let it drip off the tip and onto the fly. Collect from the center of the epoxy pool, as this will be better mixed. |
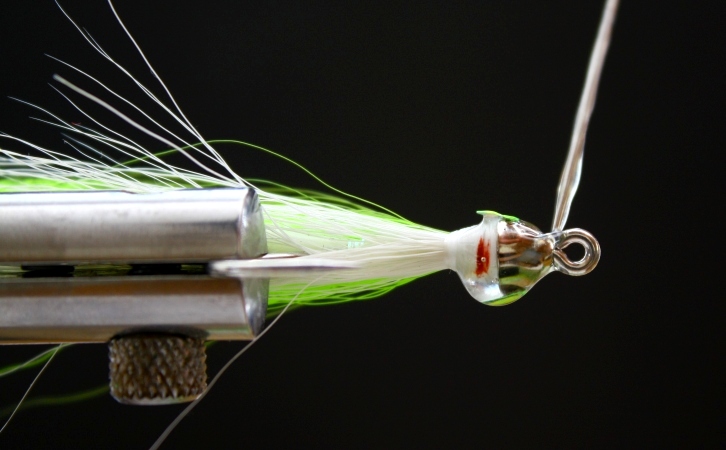
| Step 2: As the epoxy on the fly begins to drip, rotate your vise so it coats the front of the fly, using your bodkin to spread the epoxy into small gaps. |
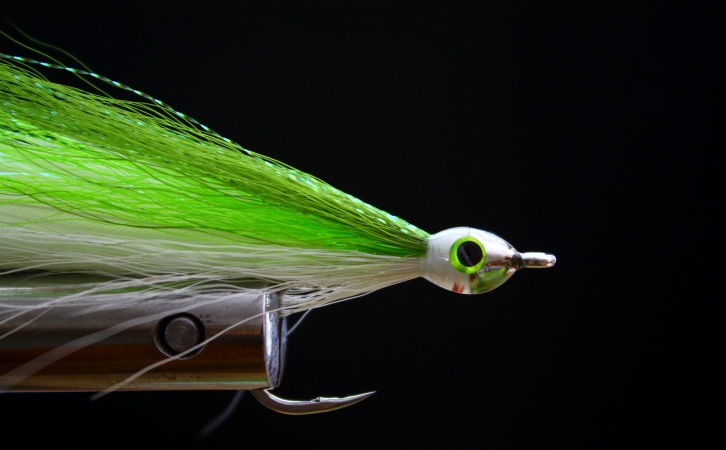
| Step 3: Shown here is the completed simple epoxy head on a Jiggy Deceiver. A nice touch on a fly like this is to spread a small amount of the epoxy slightly past the thread wraps and onto the bucktail. On this and similar flies, this helps seals the thread head completely. It also stiffens the hair wing and makes the fly less prone to fouling. You can also do this for flies with fluffy materials like hackle or bunny fur collars, as long as you carefully dampen any fluffy materials slightly with water before making the overlap (don't get any water on the thread head!) - this will keep you from creating a sticky, feathery mess! Place completely coated flies on a turner or drying wheel, and rotate until the epoxy coating will no longer drip or sag. I suggest saving the numbered card that the epoxy batch was mixed on, as you can pick that up and determine whether the epoxy has set yet, instead of touching the finished fly. When the epoxy has set and will no longer run, the fly can safely be removed from the turner and placed into a foam block or other safe place for the complete overnight cure. This will free up the turner or drying wheel for more newly coated flies. |
| Epoxy Quick Tips |
Epoxy gives you a great deal of creative license. You can stir in a tiny drop of oil paint to add
color, mix in glitter, or mold it with you fingers before it is fully cured to shape
your fly. However, if you're having trouble working with the epoxy, here are a few final tips
to keep you on track:
|